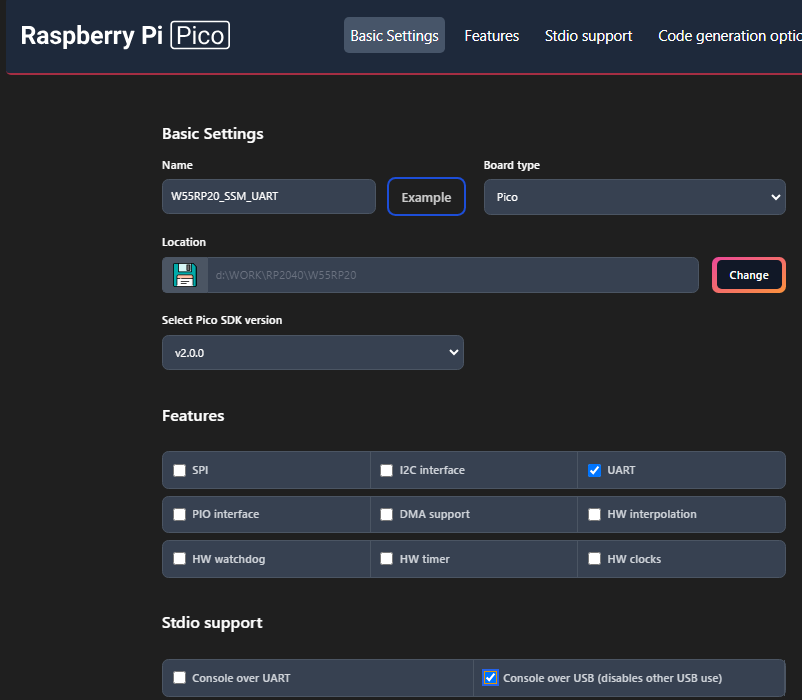
MCU의 디버깅 출력 메시지를 출력 하기해 UART를 사용하는데 RP2040 SDK에서는 UART나 USB로 설정해서 사용 할 수 있다. USB를 이용하면 USB2UART가 없어도 되기 때문에 디버깅이 편리하다.
VS Code에서 Raspberry Pi Pico용 Extention 프로그램에서 새로운 프로젝트를 생성한다. Console Over USB를 체크하면 USB2UART로 인식이 되며 printf 사용시 USB로 출력이 된다.
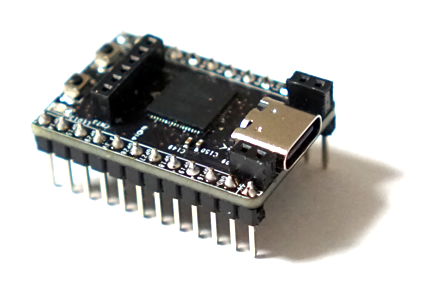
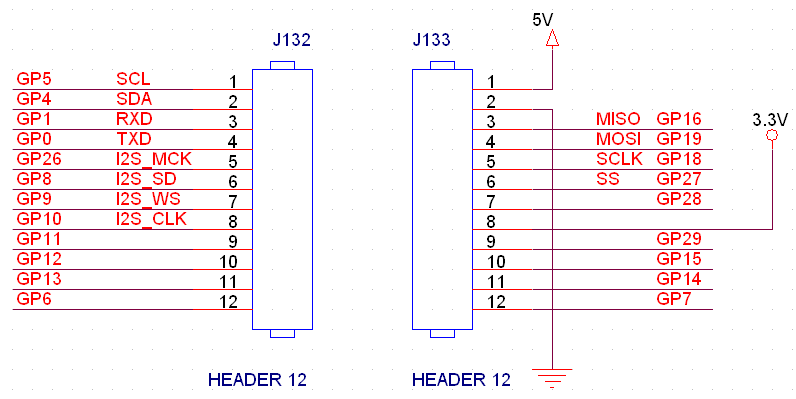
기본으로 생성되는 코드를 수정하여 [W55RP20 SSM] 보드에 맞는 핀으로 수정하면 된다.
#include "port_common.h"

#define LED1_PIN            9
#define Led1Off()           gpio_put(LED1_PIN, 1);
#define Led1On()            gpio_put(LED1_PIN, 0);

#define BAUD_RATE 115200
#define UART_ID uart1
#define UART_TX_PIN 0
#define UART_RX_PIN 1

#define PLL_SYS_KHZ (133 * 1000)

int main()
{
    int cnt = 0;

    set_clock_khz();
    stdio_init_all();

    gpio_init(LED1_PIN);
    gpio_set_dir(LED1_PIN, GPIO_OUT);

    // Set up our UART
    uart_init(UART_ID, BAUD_RATE);
    // Set the TX and RX pins by using the function select on the GPIO
    // Set datasheet for more information on function select
    gpio_set_function(UART_TX_PIN, GPIO_FUNC_UART);
    gpio_set_function(UART_RX_PIN, GPIO_FUNC_UART);

    // Send out a string, with CR/LF conversions
    uart_puts(UART_ID, " Hello, UART!\n");

    printf("W55RP20 Start\n");
    while (true) {
        gpio_put(LED1_PIN, 1);
        sleep_ms(1000);
        gpio_put(LED1_PIN, 0);
        sleep_ms(1000);

        printf("cnt=%d\n", cnt++);
    }
}
반응형


