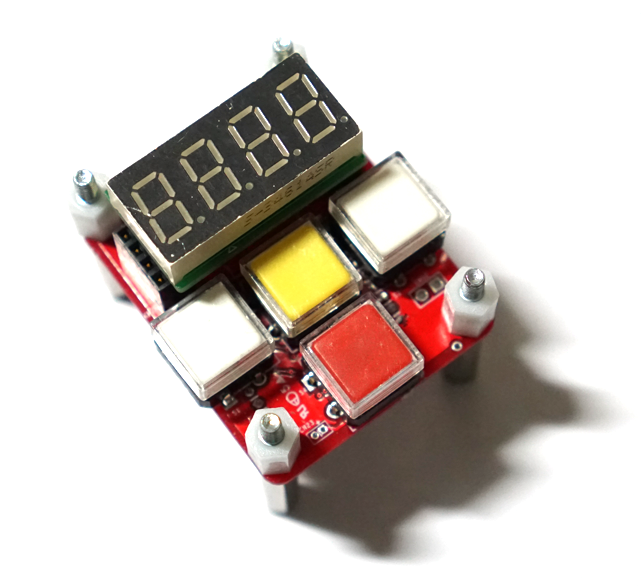
BLE 예제중 KeyBoard 예제를 테스트 해보자.
기존 Nordic의 BLE Keyboard 예제들은 잘 동작 했었는데...
nRF zephyr 예제에서 제공하는 BLE HID Keyboard 예제를 컴파일 하면 spi_nor.c 파일에서 오류가 발생한다.
from C:/ncs/v3.3.1/zephyr/drivers/flash/spi_nor.c:14:
보안 인증 관련 BLE 정보를 저장하는 장소로 디폴트가 NOR Flash로 설정되어 서 그렇다고 한다.
prj.conf 파일에서 NOR Flash를 사용하지 않도록 옵션설정하면 정상 컴파일 된다.
CONFIG_SPI_NOR=n
하지만 NOR Flash가 없으면 NVS 가 활성화 되지 않아 페어링 정보를 저장할수 없어서 문제가 된다.
특히 보안을 중요시 하는 키보드 같은 장치는 인증 정보를 NVS에 저장하기 때문에 NVS가 필수로 필요하다.
해결 방법은 내장 플래시 NVS를 사용하는 것이다.
# 내부 Flash 및 NVS 서브시스템 활성화
CONFIG_FLASH=y
CONFIG_FLASH_MAP=y
CONFIG_FLASH_PAGE_LAYOUT=y
CONFIG_NVS=y
CONFIG_SETTINGS=y
CONFIG_SETTINGS_NVS=y

# BLE 본딩/보안 데이터를 NVS에 자동 저장
CONFIG_BT_SETTINGS=y
내부 플래시로 NVS 까지 설정하고 구동하면 에러가 발생한다.
[00:00:00.019,099] [0m<inf> bt_hci_core: LMP: version 6.3 (0x11) subver 0x301f[0m
Failed to register authorization callbacks (err: -22)
BLE Keyboard의 경우 해킹 문제로 보안 인증이 까다롭다.
인증 콜백 구조체 (static const): passkey_display와 passkey_confirm을 등록하고, 충돌을 일으키는 pairing_confirm과 passkey_entry는 NULL로 명시해 주었다.
연결 시 BLE 보안 레벨 요청 추가 (BT_SECURITY_L2): connected() 콜백 내부에서 스마트폰/PC 연결 즉시 보안 암호화(페어링)를 시작하도록 bt_conn_set_security() 호출을 추가했다.
static void auth_passkey_display(struct bt_conn *conn, unsigned int passkey)
{
    char addr[BT_ADDR_LE_STR_LEN];
    bt_addr_le_to_str(bt_conn_get_dst(conn), addr, sizeof(addr));
    printk("Passkey for %s: %06u\n", addr, passkey);
}

static void auth_passkey_confirm(struct bt_conn *conn, unsigned int passkey)
{
    char addr[BT_ADDR_LE_STR_LEN];
    bt_addr_le_to_str(bt_conn_get_dst(conn), addr, sizeof(addr));

    printk("Passkey for %s: %06u (Auto-confirming)\n", addr, passkey);
    bt_conn_auth_passkey_confirm(conn);
}

static void auth_cancel(struct bt_conn *conn)
{
    char addr[BT_ADDR_LE_STR_LEN];

    bt_addr_le_to_str(bt_conn_get_dst(conn), addr, sizeof(addr));
    printk("Pairing cancelled: %s\n", addr);
}

static const struct bt_conn_auth_cb conn_auth_callbacks = {
    .passkey_display = auth_passkey_display,
    .passkey_confirm = auth_passkey_confirm,
    .passkey_entry   = NULL,
    .pairing_confirm = NULL,
    .cancel          = auth_cancel,
};
이제 BLE HID Keyboard로 정상 동작한다.
[00:00:00.018,242] [0m<inf> bt_hci_core: HW Platform: Nordic Semiconductor (0x0002)[0m
[00:00:00.018,256] [0m<inf> bt_hci_core: HW Variant: nRF54Lx (0x0005)[0m
[00:00:00.018,268] [0m<inf> bt_hci_core: Firmware: Standard Bluetooth controller (0x00) Version 252.31313 Build 1865177321[0m
[00:00:00.018,459] [0m<inf> bt_hci_core: No ID address. App must call settings_load()[0m
Bluetooth initialized
[00:00:00.018,800] [0m<inf> bt_hci_core: HCI transport: SDC[0m
[00:00:00.018,849] [0m<inf> bt_hci_core: Identity: D3:EE:FF:4F:16:39 (random)[0m
[00:00:00.018,866] [0m<inf> bt_hci_core: HCI: version 6.3 (0x11) revision 0x301f, manufacturer 0x0059[0m
[00:00:00.018,882] [0m<inf> bt_hci_core: LMP: version 6.3 (0x11) subver 0x301f[0m
Advertising successfully started
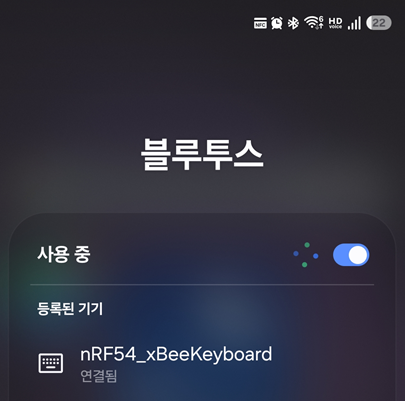
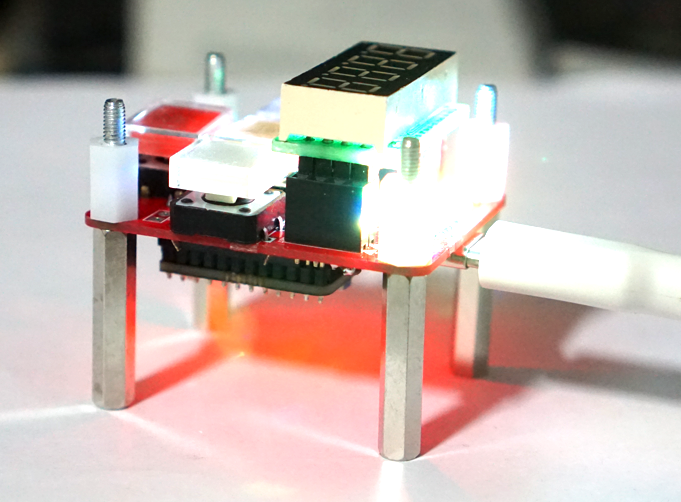
Keyboard 테스트는 Xbee용 키보드 테스트 보드에서 테스트 했다.

Key핀맵은 아래와 같다.
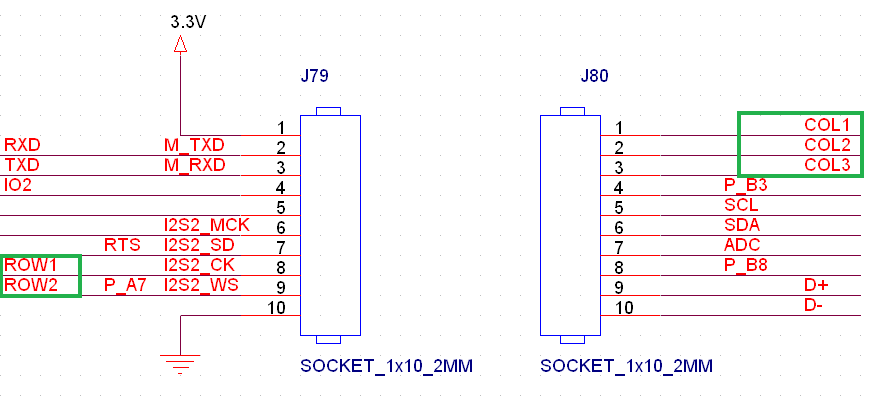
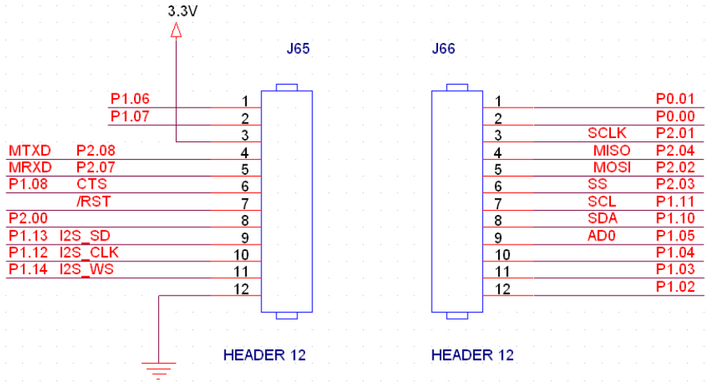
키 핀맵에 따라 GPIO 설정을 해 주어야 한다.
Key 핀맵은 인터페이스 보드에 따라 핀맵이 자주 변경이 되므로 이번에는 Devce Tree 를 사용하지 않고 GPIO 직접 제어 방식으로 작성하였다.
#include <hal/nrf_gpio.h>

// nRF54 Port.Pin 맵핑 정의
#define PIN_OUT_P1_12   NRF_GPIO_PIN_MAP(1, 12)
#define PIN_OUT_P1_14   NRF_GPIO_PIN_MAP(1, 14)

#define PIN_IN_P2_01    NRF_GPIO_PIN_MAP(2, 1)
#define PIN_IN_P2_04    NRF_GPIO_PIN_MAP(2, 4)
#define PIN_IN_P2_02    NRF_GPIO_PIN_MAP(2, 2)

void init_gpio_hal(void)
{
    // 1. 출력 핀 설정 (P1.12, P1.14)
    nrf_gpio_cfg_output(PIN_OUT_P1_12);
    nrf_gpio_cfg_output(PIN_OUT_P1_14);

    // 초기 출력 값 설정
    nrf_gpio_pin_clear(PIN_OUT_P1_12); // LOW
    nrf_gpio_pin_set(PIN_OUT_P1_14);   // HIGH

    // 2. 입력 핀 설정 (P2.01, P2.04, P2.02)
    nrf_gpio_cfg_input(PIN_IN_P2_01, NRF_GPIO_PIN_NOPULL);
    nrf_gpio_cfg_input(PIN_IN_P2_04, NRF_GPIO_PIN_NOPULL);
    nrf_gpio_cfg_input(PIN_IN_P2_02, NRF_GPIO_PIN_NOPULL);
}
[nRF54 Xbee EVM] BLE HID Keyboard 테스트 예제 코드
int main(void)
{
    int err;
    int64_t previous_time = k_uptime_get();
    int flag[3] = {0,};

    int sw1_prev_state = 1;
    int sw2_prev_state = 1;

    printk("Starting Bluetooth Peripheral HIDS keyboard sample\n");

    /* 1. 하드웨어 GPIO 초기화 */
    InitGpio();
    init_gpio_hal();

    Led1Off();
    Led2On();

    nrf_gpio_pin_write(PIN_OUT_P1_12, 1);
    nrf_gpio_pin_write(PIN_OUT_P1_14, 1);

    printk("start\n");

    sk6812_init();


    /* 2. HID 서비스 스택 초기화 */
    hid_init();

    /* 3. BLE 프로토콜 스택 활성화 */
    err = bt_enable(NULL);
    if (err) {
        printk("Bluetooth init failed (err %d)\n", err);
        return 0;
    }

    printk("Bluetooth initialized\n");

    /* 4. NVS 플래시 저장소에 보관된 본딩 설정 로드 */
    if (IS_ENABLED(CONFIG_SETTINGS)) {
        settings_load();
    }

    /* 5. BLE 스택 활성화(bt_enable) 이후 인증 콜백 등록 */
    err = bt_conn_auth_cb_register(&conn_auth_callbacks);
    if (err) {
        printk("Failed to register authorization callbacks (err: %d)\n", err);
        return 0;
    }

    err = bt_conn_auth_info_cb_register(&conn_auth_info_callbacks);
    if (err) {
        printk("Failed to register authorization info callbacks (err: %d)\n", err);
        return 0;
    }

    /* 6. BLE Advertising 시작 */
    advertising_start();

    sk6812_set_pixel(0, 255, 0, 0);   // Red
    sk6812_set_pixel(1, 0, 255, 0);   // Green
    sk6812_set_pixel(2, 0, 0, 255);   // Blue
    sk6812_set_pixel(3, 255, 255, 0); // Yellow
    sk6812_show();


    while (1)
    {
        // 입력 핀 상태 읽기 (0: LOW, 1: HIGH)
        uint32_t val_p2_01 = nrf_gpio_pin_read(PIN_IN_P2_01);
        uint32_t val_p2_04 = nrf_gpio_pin_read(PIN_IN_P2_04);
        uint32_t val_p2_02 = nrf_gpio_pin_read(PIN_IN_P2_02);

		// [P2.01 버튼 처리]
        if (val_p2_01 == 1) {
            if (!flag[0]) {
                flag[0] = 1;
                Led2Toggle();

                send_hid_string("a");
                printk("1\n");

                sk6812_set_pixel(0, 255, 0, 0);
                sk6812_set_pixel(1, 0, 0, 0);
                sk6812_set_pixel(2, 0, 0, 0);
                sk6812_set_pixel(3, 0, 0, 0);
                sk6812_show();
            }
        } else {
            flag[0] = 0; // 2. 버튼을 떼면 조건 없이 0으로 리셋
        }

        // [P2.04 버튼 처리]
        if (val_p2_04 == 1) {
            if (!flag[1]) {
                flag[1] = 1;
                Led2Toggle();

                send_hid_string("s");
                printk("2\n");

                sk6812_set_pixel(0, 0, 0, 0);
                sk6812_set_pixel(1, 0, 255, 0);
                sk6812_set_pixel(2, 0, 255, 0);
                sk6812_set_pixel(3, 0, 0, 0);
                sk6812_show();
            }
        } else {
            flag[1] = 0;
        }

        // [P2.02 버튼 처리]
        if (val_p2_02 == 1) {
            if (!flag[2]) {
                flag[2] = 1;
                Led2Toggle();

                send_hid_string("d");

                printk("3\n");

                sk6812_set_pixel(0, 0, 0, 0);
                sk6812_set_pixel(1, 0, 0, 0);
                sk6812_set_pixel(2, 0, 0, 0);
                sk6812_set_pixel(3, 0, 0, 255);

                sk6812_show();
            }
        } else {
            flag[2] = 0;
        }

        // [100ms 주기적 LED2 토글 처리]
        int64_t current_time = k_uptime_get();
        if (current_time - previous_time >= 500) {
            previous_time = current_time;

            //Led1Toggle();
        }

        k_msleep(10);
        bas_notify();
    }
}
nRF54 BLE HID Keyboard 테스트 동영상


