[RP2350-W6300 SSM] 보드를 이용하여 웹서버 테스트를 해보자.
[RP2350 SM] W6300 개발환경 설정 코드에서 웹서버 코드를 추가 할수 있다.
[RP2350 SM] W6300 테스트 개발환경 설정
RP2350을 이용하여 W6300을 테스트 해보자먼저 하드웨어 적으로 QSPI로 연결한다. [W6300 SSM] 보드는 표준 핀맵의 SPI로 할당되어 있고 나머지 핀에 QSPI 핀이 할당되어 있다. RP2350은 QSPI 하드웨어 블록은
nexp.tistory.com
웹서버를 구현하려면 ioLibrary_Driver 에서 제공하는 httpServer 코드를 복사한다.

Cmakelist 파일에 추가된 파일을 업데이트 한다.
add_executable(rp2350_w6300_test rp2350_w6300_test.c
        Ethernet/socket.c
        Ethernet/wizchip_conf.c
        Ethernet/w6300/wizchip_spi.c
        Ethernet/w6300/w6300.c
        Ethernet/w6300/wizchip_qspi_pio.c
        Ethernet/w6300/wizchip_gpio_irq.c

        Ethernet/Internet/httpServer/httpParser.c
        Ethernet/Internet/httpServer/httpServer.c
        Ethernet/Internet/httpServer/httpUtil.c
)

# Add the standard include files to the build
target_include_directories(rp2350_w6300_test PRIVATE
        ${CMAKE_CURRENT_LIST_DIR}
        ${CMAKE_CURRENT_LIST_DIR}/Ethernet
        ${CMAKE_CURRENT_LIST_DIR}/Ethernet/w6300
        ${CMAKE_CURRENT_LIST_DIR}/Ethernet/Internet/httpServer
)
W6300 웹서버 테스트 기본 코드
#define index_html  "<!DOCTYPE html>\
<html>\
<head>\
  <title> remote control</title>\
	<style>\
	.container {margin: 0 auto; text-align: center; margin-top: 80px; }\
	button {color: white; width: 150px; height: 100px;\
	border-radius: 20%; margin: 5px; border: none; font-size: 40px; outline: none; transition: all 0.2s;}\
	.red{background-color: rgb(196, 39, 39);}\
	.green{background-color: rgb(39, 121, 39);}\
	.blue {background-color: rgb(5, 87, 180);}\
	.off{background-color: grey;}\
	button:hover{cursor: pointer; opacity: 0.7;}\
	</style>\
</head>\
<body>\
	<div class='container'>\
	<h1>W6300 LED Control</h1>\
	<button class='red' type='submit' onclick='location.href=\"/led_on\"'>ON</button>\
	<button class='off' type='submit' onmousedown='location.href=\"/led_off\"'>OFF</button><br>\
	</div>\
</body>\
</html>"


/* Ethernet 통신용 버퍼 최대 크기 (송수신 각각 2KB) */
#define ETHERNET_BUF_MAX_SIZE (1024 * 2)

/* 동시에 사용할 수 있는 HTTP 소켓의 최대 개수 */
#define HTTP_SOCKET_MAX_NUM 4


/* HTTP 송신 버퍼 (2KB) */
static uint8_t g_http_send_buf[ETHERNET_BUF_MAX_SIZE] = {0};
/* HTTP 수신 버퍼 (2KB) */
static uint8_t g_http_recv_buf[ETHERNET_BUF_MAX_SIZE] = {0};
/* 사용할 소켓 번호 리스트 (0~3) */
static uint8_t g_http_socket_num_list[HTTP_SOCKET_MAX_NUM] = {0, 1, 2, 3};

int main()
{
    /* 시스템 클럭 설정 */
    set_clock_khz();

    /* 표준 입출력 초기화 (USB-CDC / UART 디버그 출력) */
    stdio_init_all();
    sleep_ms(3000);   // 초기 안정화 대기 (3초)

    /* 빌드 시각 출력 */
    printf("==========================================================\n");
    printf("Compiled @ %s, %s\n", __DATE__, __TIME__);
    printf("==========================================================\n");

    /* WIZnet 이더넷 칩 초기화 과정 */
    wizchip_spi_initialize();   // SPI 인터페이스 초기화
    wizchip_cris_initialize();  // CRIS (Critical Section) 초기화
    wizchip_reset();            // WIZnet 칩 하드웨어 리셋
    wizchip_initialize();       // 내부 레지스터 및 메모리 초기화
    wizchip_check();            // 칩 동작 확인

    /* 네트워크 환경 설정 (IP, Gateway, Subnet 등) */
    network_initialize(g_net_info);

    /* 현재 네트워크 정보 출력 */
    print_network_information(g_net_info);

    // HTTP 서버 초기화
    httpServer_init(g_http_send_buf, g_http_recv_buf, HTTP_SOCKET_MAX_NUM, g_http_socket_num_list);

    /* 웹 서버에 페이지 등록
       - "index.html" 요청 시 index_html 배열을 응답
       - "led_on", "led_off" 요청도 동일하게 index_html 반환 */
    reg_httpServer_webContent("index.html", index_html);
    reg_httpServer_webContent((uint8_t *)"led_on", (uint8_t *)index_html);
    reg_httpServer_webContent((uint8_t *)"led_off", (uint8_t *)index_html);

    /* 메인 루프: HTTP 서버 실행 */
    while (true) {
        /* 등록된 소켓들(0~3)에 대해 HTTP 서버 동작 */
        for (int i = 0; i < HTTP_SOCKET_MAX_NUM; i++) {
            httpServer_run(i);
        }
    }
}
컴파일 후 실행하고 보드의 IP로 접속하면 index_html 페이지가 출력되는 것을 확인 할 수 있다.

이번에는 on/off 에 따른 페이지 요청에 대한 처리를 해주는 코드를 작성하자.
httpServer.c 파일에서 http_process_handler 함수를 수정해서 페이지 요청에 따른 콜백 함수를 처리 할수 있도로 한다.
static void http_process_handler(uint8_t s, st_http_request * p_http_request)
{
	uint8_t * uri_name;
	uint32_t content_addr = 0;
	uint16_t content_num = 0;
	uint32_t file_len = 0;

	uint8_t uri_buf[MAX_URI_SIZE]={0x00, };

	uint16_t http_status;
	int8_t get_seqnum;
	uint8_t content_found;

	if((get_seqnum = getHTTPSequenceNum(s)) == -1) return; // exception handling; invalid number

	http_status = 0;
	http_response = pHTTP_RX;
	file_len = 0;

	//method Analyze
	switch (p_http_request->METHOD)
	{
		case METHOD_ERR :
			http_status = STATUS_BAD_REQ;
			send_http_response_header(s, 0, 0, http_status);
			break;

		case METHOD_HEAD :
		case METHOD_GET :
			get_http_uri_name(p_http_request->URI, uri_buf);
			uri_name = uri_buf;

			if (!strcmp((char *)uri_name, "/")) strcpy((char *)uri_name, INITIAL_WEBPAGE);	// If URI is "/", respond by index.html
			if (!strcmp((char *)uri_name, "m")) strcpy((char *)uri_name, M_INITIAL_WEBPAGE);
			if (!strcmp((char *)uri_name, "mobile")) strcpy((char *)uri_name, MOBILE_INITIAL_WEBPAGE);
			find_http_uri_type(&p_http_request->TYPE, uri_name);	// Checking requested file types (HTML, TEXT, GIF, JPEG and Etc. are included)

#ifdef _HTTPSERVER_DEBUG_
			printf("\r\n> HTTPSocket[%d] : HTTP Method GET\r\n", s);
			printf("> HTTPSocket[%d] : Request Type = %d\r\n", s, p_http_request->TYPE);
			printf("> HTTPSocket[%d] : Request URI = %s\r\n", s, uri_name);
#endif

			if(ProcessUserPageCb(uri_name, p_http_request) == 1)
			{

				if(find_userReg_webContent(uri_buf, &content_num, &file_len))
				{
					content_found = 1; // Web content found in code flash memory
					content_addr = (uint32_t)content_num;
					HTTPSock_Status[get_seqnum].storage_type = CODEFLASH;
				}

				if(!content_found)
				{
#ifdef _HTTPSERVER_DEBUG_
					printf("> HTTPSocket[%d] : Unknown Page Request\r\n", s);
#endif
					http_status = STATUS_NOT_FOUND;
				}
				else
				{
#ifdef _HTTPSERVER_DEBUG_
					printf("> HTTPSocket[%d] : Find Content [%s] ok - Start [%ld] len [ %ld ]byte\r\n", s, uri_name, content_addr, file_len);
#endif
					http_status = STATUS_OK;
				}

				// Send HTTP header
				if(http_status)
				{
					//send_http_response_header(s, p_http_request->TYPE, file_len, http_status);
				}

				// Send HTTP body (content)
				if(http_status == STATUS_OK)
				{
					send_http_response_body(s, uri_name, http_response, content_addr, file_len);
				}

				break;
			}
메인함수에 콜백함수 ProcessUserPageCb 를 등록하고 페이지 요청에 따를 처르를 해 주면 된다.
unsigned int ProcessUserPageCb(uint8_t *uri_name, st_http_request * p_http_request)
{
	if(strstr(p_http_request->URI, "led_off"))
	{
		Led1Off();

		printf("LED ->%s\r\n", uri_name);
        return 1;
	}
	else if(strstr(p_http_request->URI, "led_on"))
	{
		Led1On();
		printf("LED ->%s\r\n", uri_name);
        return 1;
	}

	return 0;
}
좀더 복잡한 웹페이지를 표현하기 위해 바이너리 파일을 처리 할 수 있는 코드가 있으면 좋을것 같다. 그림파일이나 자바 복잡한 자바 스크립트 파일등은 바이너리로 저장해서 처리 하도록 하면 편리하다.
void reg_httpServer_webContentB(uint8_t * content_name, const uint8_t * content, unsigned int size)
{
	uint16_t name_len;
	uint32_t content_len;

	if(content_name == NULL || content == NULL)
	{
		return;
	}
	else if(total_content_cnt >= MAX_CONTENT_CALLBACK)
	{
		return;
	}

	name_len = strlen((char *)content_name);
	content_len = size;

	web_content[total_content_cnt].content_name = malloc(name_len+1);
	strcpy((char *)web_content[total_content_cnt].content_name, (const char *)content_name);
	web_content[total_content_cnt].content_len = content_len;
	web_content[total_content_cnt].content = content;

	total_content_cnt++;
}
바이너리 처리 함수를 추가해서 웹페이지를 등록
    /* Register web page */
    reg_httpServer_webContentB("index.html", index_html, 4594);
    reg_httpServer_webContentB("basic.ccs", basic_ccs, 2408);
    reg_httpServer_webContentB("javascript.js", myjava_lib, 10763);
    reg_httpServer_webContent((uint8_t *)"led_on", (uint8_t *)index_html);
    reg_httpServer_webContent((uint8_t *)"led_off", (uint8_t *)index_html);
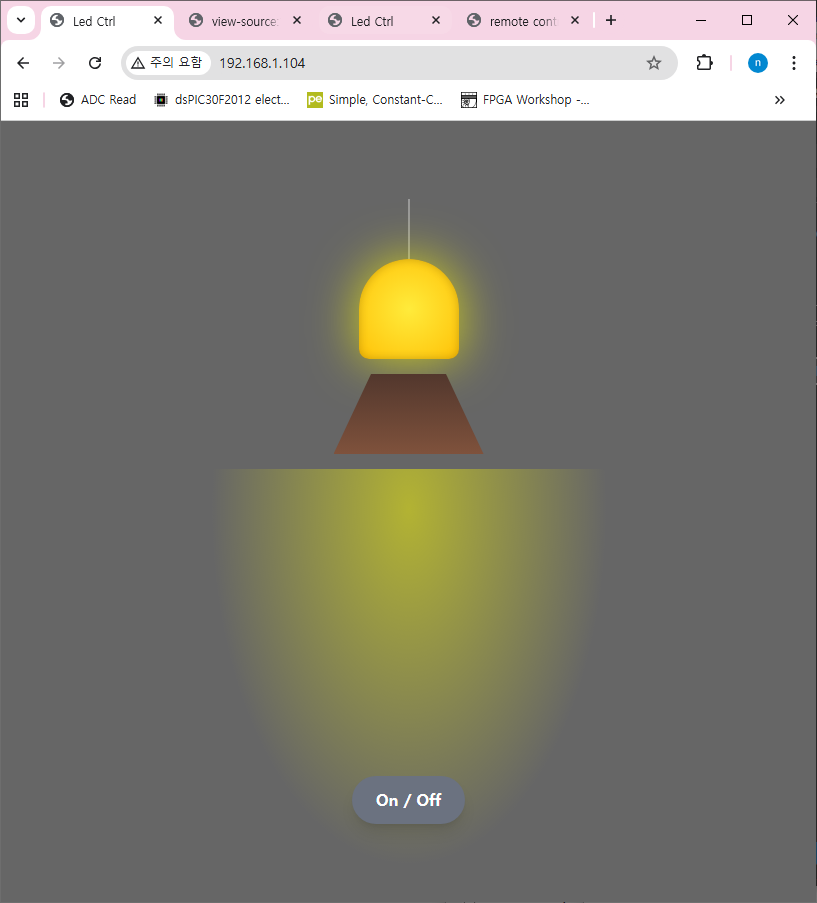
이렇게해서 좀더 복잡한 웹페이지도 쉽게 처리 할 수 있게 되었다. W6300의 네트웍 전송속도가 빠르기 때문에 복잡한 웹페이지도 부드럽게 잘 치리 되는것 같다.