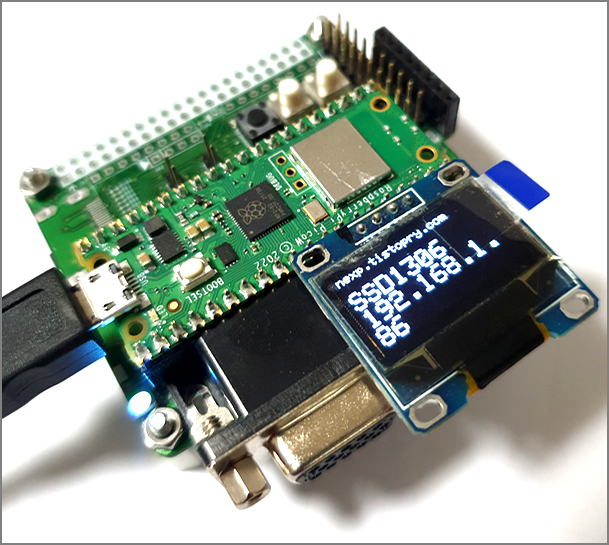
Raspberry Pi Pico W 보드는 기존에 제작 했던 Raspberry Pi Pico 확장 테스트 보드를 이용하여 테스트 하였다.
Arduino 는 최신 버전을 다운 받는것이 좋다.
Arduino IDE 2.0 RC 를 설치 하였다.
https://www.arduino.cc/en/software
Software
Open-source electronic prototyping platform enabling users to create interactive electronic objects.
www.arduino.cc
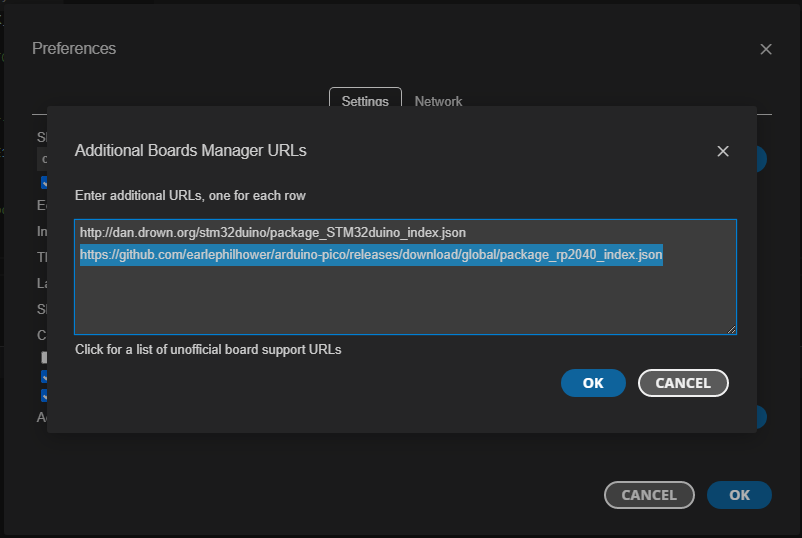
Preferences 에서 RP2040 Arduino Board Manager URL을 설정 한다.
https://github.com/earlephilhower/arduino-pico/releases/download/global/package_rp2040_index.json
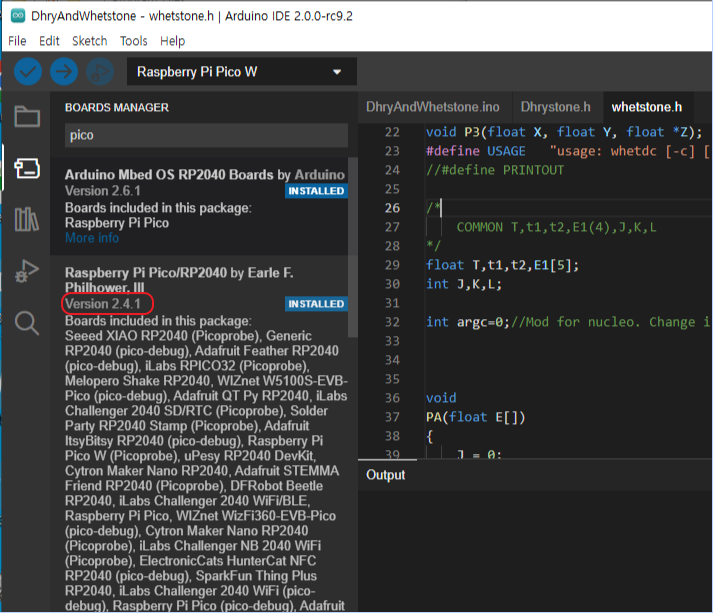
Arduino IDE 의 Board Manager 에서 pico를 검색해서 최신의 Raspberry Pi Pico 보드파일 최신 버전을 설치 한다.
사용할 보드(Rapberry Pi Pico W)를 설정한다.
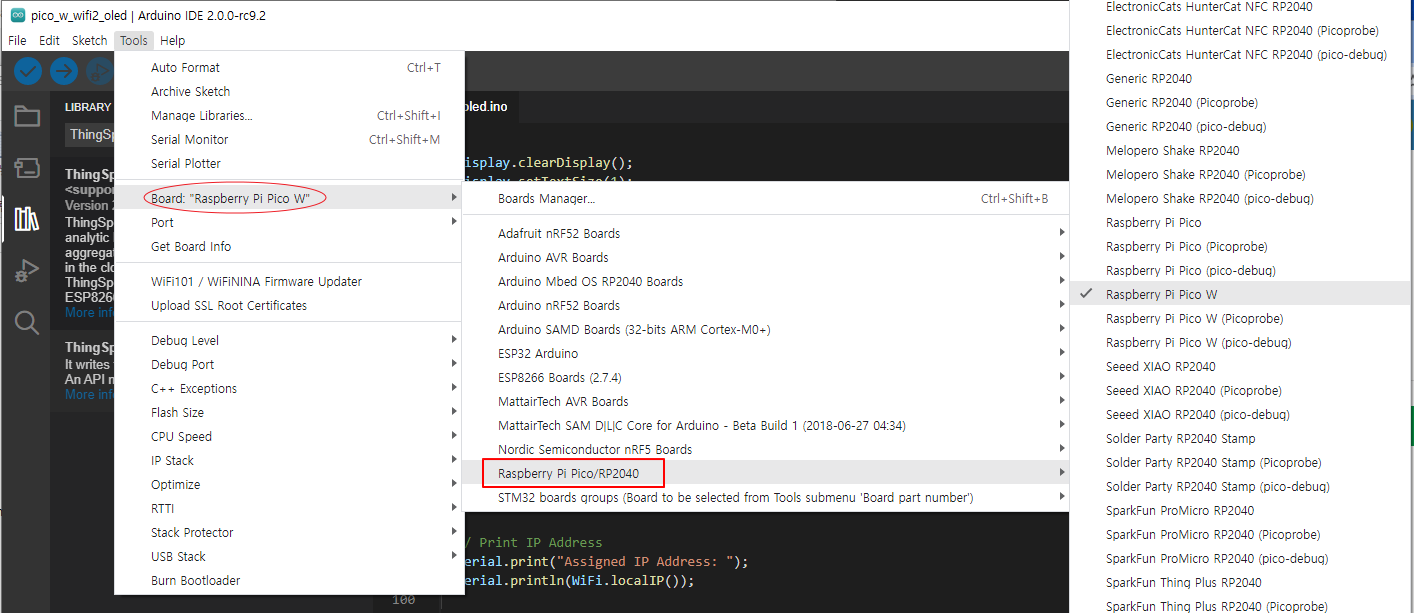
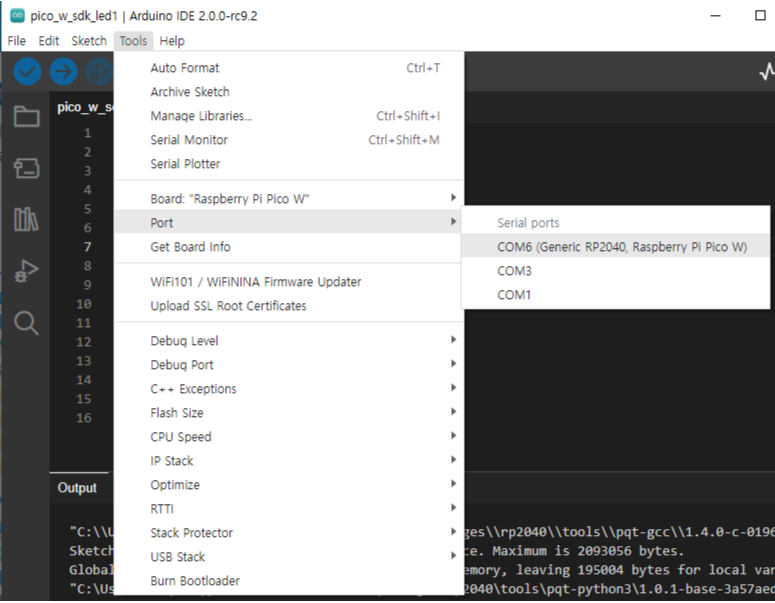
Raspberry Pi Pico W 의 인식된 시리얼 포트를 설정한다.
Raspberry Pi Pico W 의 WiFi 기능을 테스트 하기 위해 간단히 할당받은 IP를 출력 하는 코드를 작성해 다운로드 하면 정상 동작 하는것을 확인 할 수 있다.
// Include the WiFi Library
#include <WiFi.h>

// Replace with your network credentials
const char* ssid = "****";
const char* password = "****";

void setup() {

  // Start the Serial Monitor
  Serial.begin(115200);

  // Operate in WiFi Station mode
  WiFi.mode(WIFI_STA);

  // Start WiFi with supplied parameters
  WiFi.begin(ssid, password);

  // Print periods on monitor while establishing connection
  while (WiFi.status() != WL_CONNECTED) {
    delay(500);
    Serial.print(".");
    delay(500);
  }

  // Connection established
  Serial.println("");
  Serial.print("Pico W is connected to WiFi network ");
  Serial.println(WiFi.SSID());

  // Print IP Address
  Serial.print("Assigned IP Address: ");
  Serial.println(WiFi.localIP());

}

void loop() {

  delay(2000);

  // Print IP Address
  Serial.print("Assigned IP Address: ");
  Serial.println(WiFi.localIP());

}
반응형


