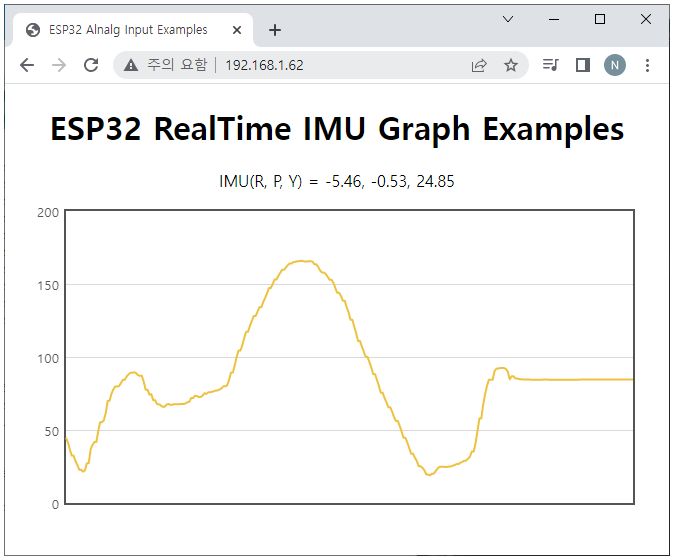
ESP32 실시간 웹서버 테스트 코드를 이용하여 MPU9250 의 Roll, Pitch, Yaw 그래프를 출력 하는 테스트를 진행해 보았다.
우선 MPU9250의 데이터를 이용해 이벤트를 만드는 부분은 mpu_9250_set.h 파일에 작성하고 추후 센서가 변경되면 헤더 파일만 바꿀 수 있는 구조로 했다.
#include <Arduino.h>
#include <Wire.h>
#include <MPU9250.h>

MPU9250 mpu;

void setup_Sensor(){
    Wire.begin();
    delay(2000);

    if (!mpu.setup(0x68)) {
        while (1) {
            Serial.println("MPU connection failed.");
            delay(5000);
        }
    }
    Serial.println("MPU success");
}


void ProcessUpdate(AsyncEventSource *events)
{
    char buf[64];

    if(mpu.update())
    {
        static const unsigned long EVENT_INTERVAL_MS = 30;
        static uint32_t prev_ms = millis();

        if (millis() > prev_ms + EVENT_INTERVAL_MS)
        {
            //이벤트 발송
            sprintf(buf, "%.2f, %.2f, %.2f", mpu.getPitch(), mpu.getRoll() , mpu.getYaw());
            events->send(buf,"light",millis());

            prev_ms = millis();
        }
    }
}
ESP32 실시간 웹서버 코드는 기존 코드를 그대로 사용했다.
#ifdef ESP32 // ESP32 libraries
#include <WiFi.h>
#include <AsyncTCP.h>
#else // ESP8266 libraries
#include <ESP8266WiFi.h>
#include <ESPAsyncTCP.h>
#endif
#include <ESPAsyncWebServer.h>
#include <SPIFFS.h>
// SSID & Password

#include "mpu9250_set.h"

AsyncWebServer server(80);
AsyncEventSource events("/events");

void InitWebServer()
{
	server.addHandler(&events);

    server.on("/", onRootRequest);
    server.serveStatic("/", SPIFFS, "/");
    server.begin();
}

void setup(){
  // Serial port for debugging purposes
  Serial.begin(115200);

  // initialize the LED pin as an output
  pinMode(ledPin, OUTPUT);

  InitSPIFFS();

  setup_Sensor();

  // Connect to Wi-Fi
  WiFi.begin(ssid, password);
  while (WiFi.status() != WL_CONNECTED) {
    delay(1000);
    Serial.println("Connecting to WiFi..");
  }
  // Print ESP32 Local IP Address
  Serial.println(WiFi.localIP());

  InitWebServer();
}

void loop(){
    ProcessUpdate(&events);
}
ESP32 실시간 웹서버 IMU 그래프 출력 테스트 결과

https://youtube.com/shorts/fmk8WKu9Ae0?feature=share

반응형


