Raspberry Pi PicoW 는 WiFi 기능을 제공한다. WiFi 모듈을 이용해서 간단한 웹서버 테스트를 진행해 보자.
ESP32의 경우 편리한 WebServer 라이브러리를 제공하는데 Pi PicoW도 거의 유사한 라이브러리를 제공한다. ESP32 Simple WebServer 테스트 코드를 이용해서 웹서버 구동 코드를 작성하자.
#include <WiFi.h>
#include <WiFiClient.h>
#include <WebServer.h>
#include <LEAmDNS.h>

#ifndef STASSID
#define STASSID "****"
#define STAPSK "****"
#endif

const char* ssid = STASSID;
const char* password = STAPSK;

WebServer server(80);
const int Led1Pin = 9;

#if 1
const char index_html[] PROGMEM = R"rawliteral(
<!DOCTYPE html>
<html>
<head>
<style>
</style>
</head>
<body>
<center>
<h1><center>Simple Web Server</h1>
<br><br>
    <a href="on"><button class="styled" type="button">LED On</button></a><p>
    <br>
    <a href="off"><button class="styled" type="button">LED Off</button></a><p>
</center>
</body>
</html>
)rawliteral";
#endif


void handleRoot() {
  server.send(200, "text/html", index_html);
}

void handleNotFound() {
  String message = "File Not Found\n\n";
  message += "URI: ";
  message += server.uri();
  message += "\nMethod: ";
  message += (server.method() == HTTP_GET) ? "GET" : "POST";
  message += "\nArguments: ";
  message += server.args();
  message += "\n";
  for (uint8_t i = 0; i < server.args(); i++) {
    message += " " + server.argName(i) + ": " + server.arg(i) + "\n";
  }
  server.send(404, "text/plain", message);
}

//On 버튼 페이지 처리함수
void SetLedStatusOn()
{
    Serial.println("On");
    digitalWrite(Led1Pin, 0);
    server.send(200, "text/html", index_html);
}

//Off 버튼 페이지 처리함수
void SetLedStatusOff()
{
    Serial.println("Off");
    digitalWrite(Led1Pin, 1);
    server.send(200, "text/html", index_html);
}

void InitWebServer()
{
  //페이지 요청 처리 함수 등록
  server.on("/", handleRoot);
  server.on("/on", HTTP_GET, SetLedStatusOn);
  server.on("/off", HTTP_GET, SetLedStatusOff);
  server.onNotFound(handleNotFound);

  server.begin();
}

void InitWiFi(void)
{
  WiFi.mode(WIFI_STA);
  WiFi.begin(ssid, password);

  // Wait for connection
  while (WiFi.status() != WL_CONNECTED) {
    delay(500);
    Serial.print(".");
  }
}

void setup(void) {
  pinMode(Led1Pin, OUTPUT);
  digitalWrite(Led1Pin, 0);
  Serial.begin(115200);

  InitWiFi();

  Serial.println("");
  Serial.print("Connected to ");
  Serial.println(ssid);
  Serial.print("IP address: ");
  Serial.println(WiFi.localIP());

  InitWebServer();
  Serial.println("HTTP server started");
}

void loop(void) {
  server.handleClient();
}
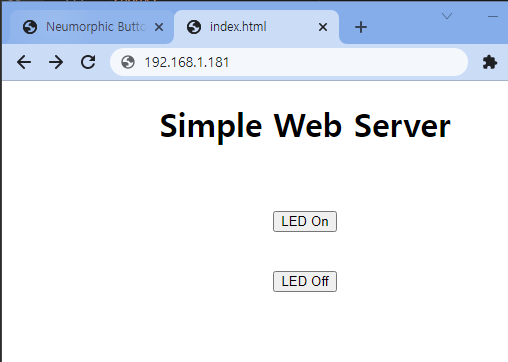
RP2040에 펌웨어를 다운로드 하면 웹서버 화면이 출력되고 LED On/Off 제어를 할 수 있다.
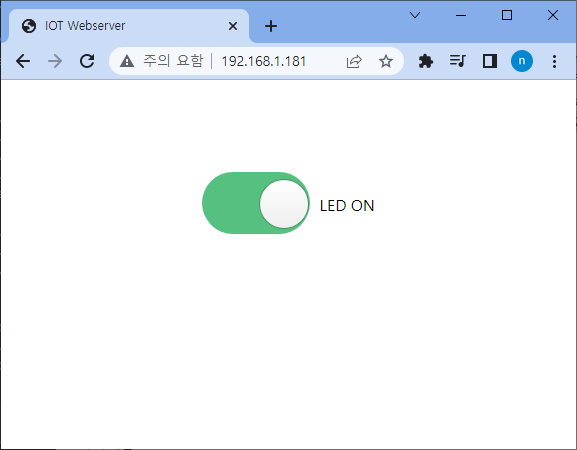
HTML 코드의 style 테그를 추가 해서 CSS를 작성하면 좀더 보기 좋은 웹 페이지를 볼 수 있다.
const char index_html[] PROGMEM = R"rawliteral(
<!DOCTYPE HTML><html>
<head>
  <title>IOT Webserver</title>
  <meta name="viewport" content="width=device-width, initial-scale=1">
  <style>
*,
*:before,
*:after {
  box-sizing: border-box;
}
body {
  font-family: -apple-system, ".SFNSText-Regular", "Helvetica Neue", "Roboto", "Segoe UI", sans-serif;
}
.toggle {
  cursor: pointer;
  display: inline-block;
}
.toggle-switch {
  display: inline-block;
  background: #ccc;
  border-radius: 32px;
  width: 108px;
  height: 62px;
  position: relative;
  vertical-align: middle;
  transition: background 0.25s;
}
.toggle-switch:before, .toggle-switch:after {
  content: "";
}
.toggle-switch:before {
  display: block;
  background: linear-gradient(to bottom, #fff 0%, #eee 100%);
  border-radius: 50%;
  box-shadow: 0 0 0 1px rgba(0, 0, 0, 0.25);
  width: 48px;
  height: 48px;
  position: absolute;
  top: 8px;
  left: 4px;
  transition: left 0.25s;
}
.toggle:hover .toggle-switch:before {
  background: linear-gradient(to bottom, #fff 0%, #fff 100%);
  box-shadow: 0 0 0 2px rgba(0, 0, 0, 0.5);
}
.toggle-checkbox:checked + .toggle-switch {
  background: #56c080;
}
.toggle-checkbox:checked + .toggle-switch:before {
  left: 58px;
}
.toggle-checkbox {
  position: absolute;
  visibility: hidden;
}
.toggle-label {
  margin-left: 5px;
  position: relative;
  top: 4px;
}
</style>
<script>
}
</script>
</head>
<body>
<BR>
<BR>
<BR>
<BR>
<center>
<label class="toggle">
  <input class="toggle-checkbox" type="checkbox" checked>
  <div class="toggle-switch"></div>
  <span class="toggle-label">LED ON</span>
</label>
</center>
</body>
</html>)rawliteral";
반응형


