RaspberryPi/RP2040
RP2040 SSM EVM - W5500 웹서버 테스트
nexp
2021. 2. 3. 04:36
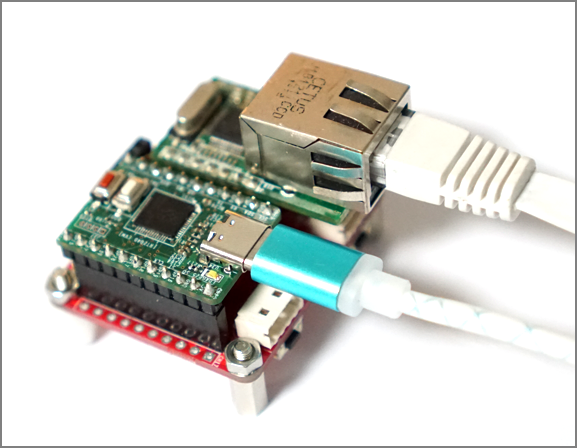
W5500 을 이용하여 RP2040에서 웹서버를 구현해 보자
우선 Arduino Ethernet Webserver 코드에서 가장 심플한 형태로 웹페이지 표시를 해 보면 아래와 같이 코드를 작성할 수 있다.
#include <SPI.h>
#include <Ethernet2.h>

#define W5500_CS_PIN            17
#define Led1On() digitalWrite(25, 1)
#define Led1Off() digitalWrite(25, 0)

byte mac[] = {
    0x00, 0x08, 0xdc, 0x00, 0x00, 0x00
};

IPAddress ip(192, 168, 1, 177);
EthernetServer server(80);

const char response_msg[] PROGMEM = "HTTP/1.1 200 OK\r\nContent-type:text/html\r\nConnection: close";

//HTML페이지
const char index_html[] PROGMEM = R"rawliteral(
<html>
<head> <title>Simple Web Server</title>
</head>
<body>
 <h1>W5500 Simple Web Server</h1>
  <p>LED Control</strong></p>
</body></html>
)rawliteral";


void setup() {
  pinMode(25, OUTPUT);
  digitalWrite(25, 1);

  Serial.begin(115200);
  /*
  while (!Serial) {
    ; // wait for serial port to connect. Needed for Leonardo only
  }*/

  Serial.print("server is at : ");
  // start the Ethernet connection and the server:
  Ethernet.w5500_cspin = W5500_CS_PIN;

  Ethernet.begin(mac, ip);
  server.begin();

  DisplayIp(Ethernet.localIP());
  Serial.println(Ethernet.localIP());
}


void loop() {
  WiFiClient client = server.available();
  if (client) {
    String header = "";
    while (client.connected()) {
      if (client.available()) {
        char c = client.read();
        Serial.write(c);

        if (c != '\n' && c != '\r') {
          header += c;
        }

        if (c == '\n') {
          if (header.length() == 0) {
            client.println(response_msg);
            client.println();

            Serial.print(header);

            client.println(index_html);
            client.println();

            break;
          } else {
            header = "";
          }
        }
      }
    }

    client.stop();
  }
}
이제 HTML 코드에 CCS 스타일을 추가 해서 좀더 이쁘게 화면을 꾸며보자.
const char index_html[] PROGMEM = R"rawliteral(
<html>
<head> <title>Simple Web Server</title>
 <meta name="viewport" content="width=device-width, initial-scale=1">
 <link rel="icon" href="data:,">
<style>
  html{font-family: Helvetica; display:inline-block; text-align: center;}
  h1{color: #0F3376; padding: 2vh;}p{font-size: 1.5rem;}.button{display: inline-block; background-color: #FF6A00; border: none;
  border-radius: 4px; color: white; padding: 16px 40px; text-decoration: none; font-size: 30px; margin: 2px; cursor: pointer;}
  .button2{display: inline-block; background-color: #4CFF00; border: none;
  border-radius: 4px; color: white; padding: 16px 30px; text-decoration: none; font-size: 30px; margin: 2px; cursor: pointer;}
</style>
</head>
<body>
 <h1>W5500 Simple Web Server</h1>
  <p>LED Control</strong></p>
  <p><a href="/led1=on"><button class="button">ON</button></a><a href="/led1=off"><p></p><button class="button2">OFF</button></a></p>
</body></html>
)rawliteral";
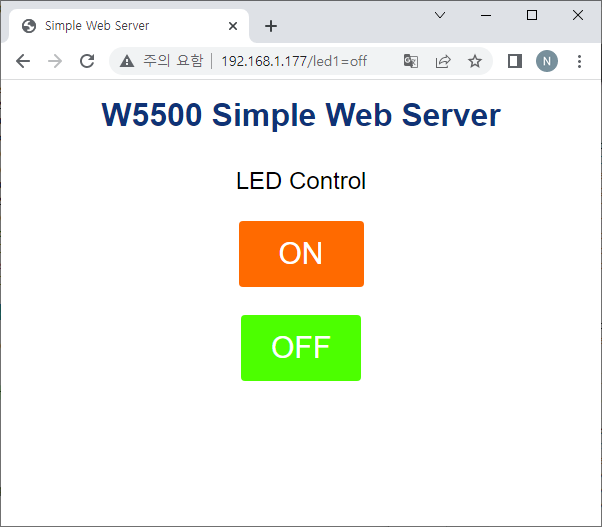
LED On/Off 를 제어 하기 위해 페이지 요청에 따라 각각의 제어 코드를 추가 하면 된다.
unsigned int ProcessUserPage(String *http_request)
{
    if (http_request->indexOf("GET /led1=on") >= 0) {
      Serial.println("LED on");

      Led1On();
    } else if (http_request->indexOf("GET /led1=off") >= 0) {
      Serial.println("LED off");

      Led1Off();
    }
	return 0;
}

void loop() {
  WiFiClient client = server.available();
  if (client) {
    String header = "";
    while (client.connected()) {
      if (client.available()) {
        char c = client.read();
        Serial.write(c);

        if (c != '\n' && c != '\r') {
          header += c;
        }

        if (c == '\n') {
          if (header.length() == 0) {
            client.println(response_msg);
            client.println();

            Serial.print(header);

            //페이지 요청에 따른 처리
            ProcessUserPage(&header);

            client.println(index_html);
            client.println();

            break;
          } else {
            header = "";
          }
        }
      }
    }

    client.stop();
  }
}
반응형